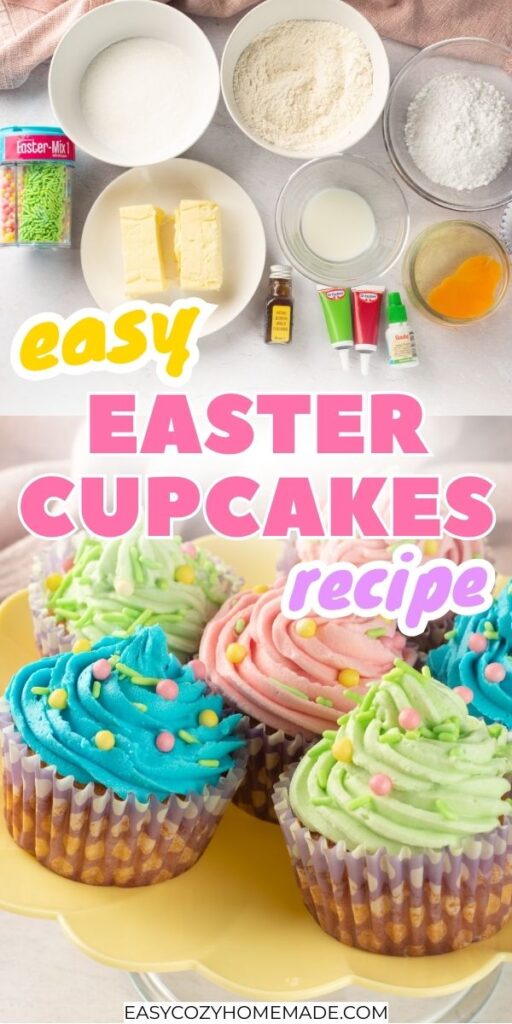
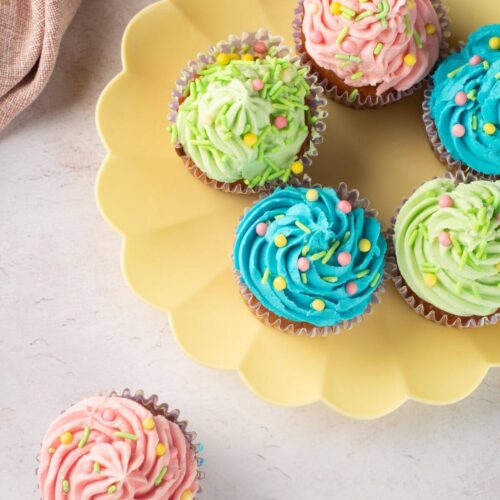
Simple Easter Cupcakes
What better way to celebrate Easter than with some delicious vanilla cupcakes?
These aren’t just any cupcakes—they’re festive, fun, and perfect for bringing everyone together.
Whether you’re planning a family gathering or just want a simple treat to brighten the holiday, these cupcakes are a total win.
Save for later:
Plus, they’re super easy to make, so you don’t have to stress about spending hours in the kitchen.
Grab your favorite sprinkles, a little food coloring, and let’s create something sweet and memorable!
Ingredients You’ll Need
Whether you’re a seasoned baker or just whipping up something sweet for Easter with your family, getting the ingredients just right is key.
These cupcakes are simple at heart, but each ingredient plays a big role in making them fluffy, flavorful, and totally irresistible.
Let’s break it down so your pantry is ready to go.
Key Ingredients for the Vanilla Cupcakes
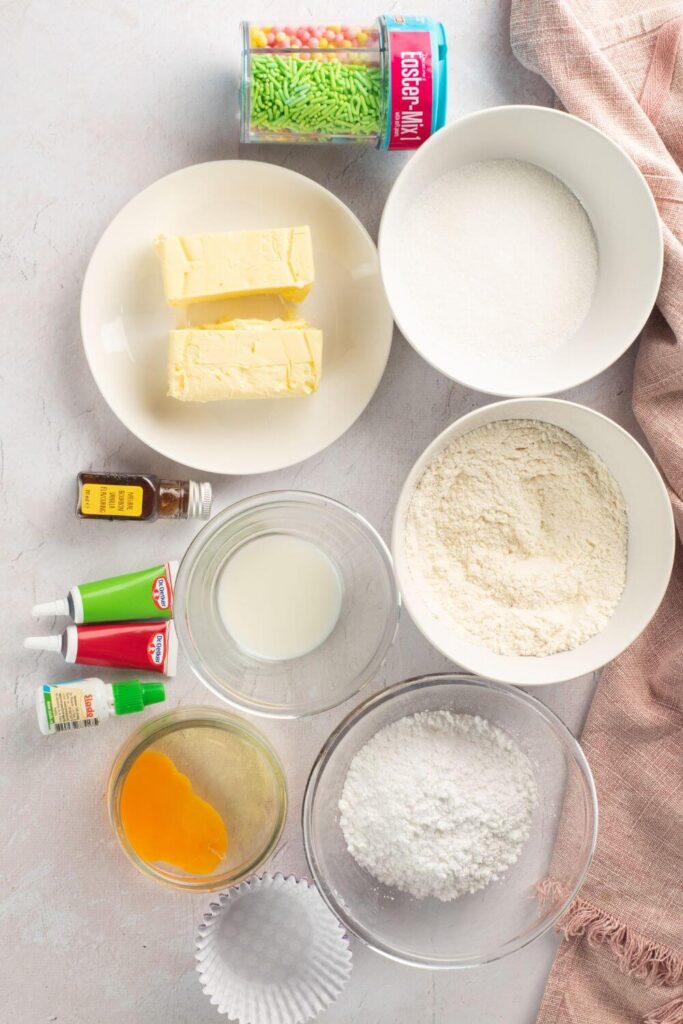
The beauty of these cupcakes is that they rely on everyday ingredients you probably already have in your kitchen. Here’s what you’ll need and why each one matters:
- Butter: Using softened butter is non-negotiable here. It’s the secret behind the rich flavor and soft, moist texture. Make sure it’s room temperature so it creams beautifully with the sugar.
- Sugar: Granulated sugar is what gives these cupcakes their sweetness and helps with structure. Beat it with the butter until it’s fluffy—that’s where the magic starts.
- Egg: This is your binding agent (aka the glue), holding everything together. Plus, it adds richness and helps the cupcakes rise. Room temp is best!
- Vanilla Extract: A little vanilla goes a long way to give that classic, comforting flavor. Use pure vanilla extract if you can—it’s so worth it for that bold aroma.
- All-Purpose Flour: Simple, everyday flour keeps these cupcakes light without making them overly fussy. Make sure to measure correctly (spoon and level!) for the perfect consistency.
- Baking Powder: The leavening powerhouse. This little bit of baking powder is what gives your cupcakes that beautiful rise, so don’t skip it!
- Milk: Just a splash helps to thin out the batter and keeps it moist without being heavy. It’s that final touch for a silky-smooth mix.
Bring all your ingredients to room temperature before you get started. It makes everything blend together smoothly—no weird lumps or surprises!
Ingredients for Frosting and Decorations
No cupcake is complete without frosting, right? And since it’s Easter, we’re going all-in on the festive decorations. Here’s what you need to make those cupcakes as cute as they are delicious:
- Butter: Once again, softened butter is your MVP here. It’s the base for that creamy, dreamy frosting. Whip it until it’s pale, fluffy, and pure magic.
- Powdered Sugar: This is what gives frosting its sweetness and stable consistency. Add it gradually to avoid an accidental sugar explosion in your kitchen (we’ve all been there).
- Food Coloring: Pastel shades are ideal for Easter vibes. Just one drop of gel coloring per bowl will do the trick without overloading the frosting.
- Milk (optional): If your frosting feels a little thick, a tiny splash will help loosen it up to the perfect piping consistency. Start small—you can always add more, not less.
- Sprinkles: The more, the merrier! Go for pastel-colored sprinkles to match the Easter theme, or grab some bunny-, flower-, or egg-shaped varieties to really set the mood.
- Themed Toppers: If you’re feeling extra festive, pick up some adorable Easter toppers. Tiny edible carrots, candy eggs, or even cute little chicks add a fun finishing touch.
How to Make Easter Cupcakes
There’s something truly magical about baking vanilla cupcakes for Easter—they’re simple, sweet, and incredibly fun to make!
You may be a seasoned pro in the kitchen or just someone who loves a good dessert project, this step-by-step guide will help you whip up the perfect Easter treats.
Trust me, this process is just as smooth and enjoyable as long as you follow the steps.
Preparing the Cupcake Batter
Making the actual batter is where the magic begins, and believe me, it’s easier than you think! You’ll just want to pay attention to a few little tricks along the way to get those soft, fluffy cupcakes that make everyone ask for seconds. Here’s how I do it:
- Start with the dry ingredients. In a bowl, sift together the flour and baking powder. Sifting might feel unnecessary, but don’t skip it! It’s what keeps the cupcake texture light, airy, and totally irresistible.
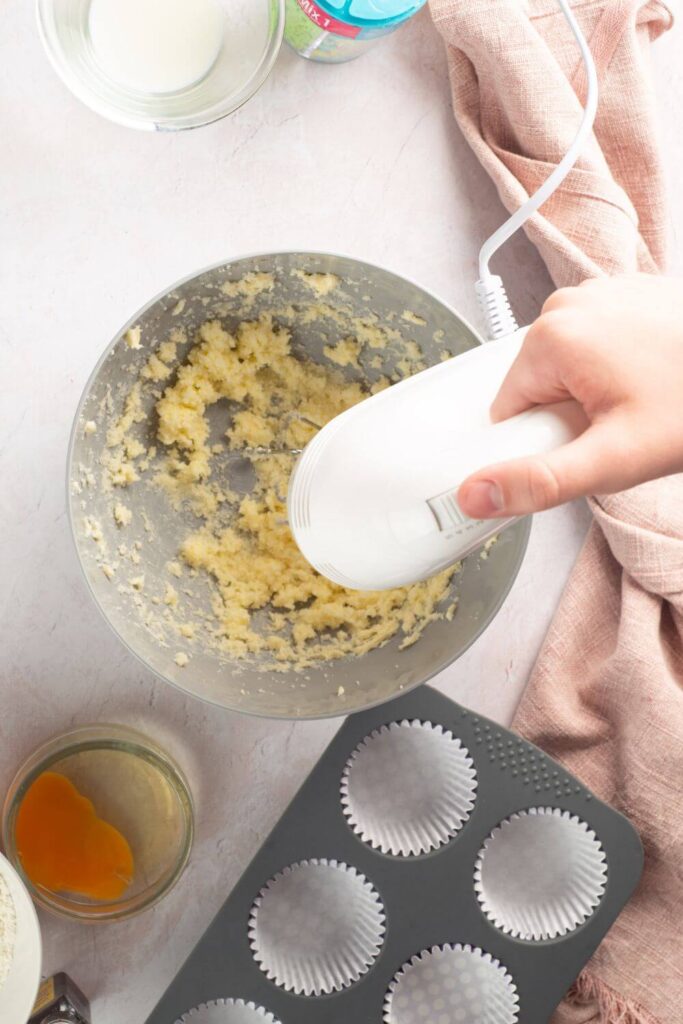
- Cream the butter and sugar. In a separate mixing bowl, use an electric hand mixer (or some good old-fashioned elbow grease) to cream your softened butter and sugar together until it’s pale and fluffy. Think of this step as the foundation for flavor—it’s what makes every bite melt in your mouth.
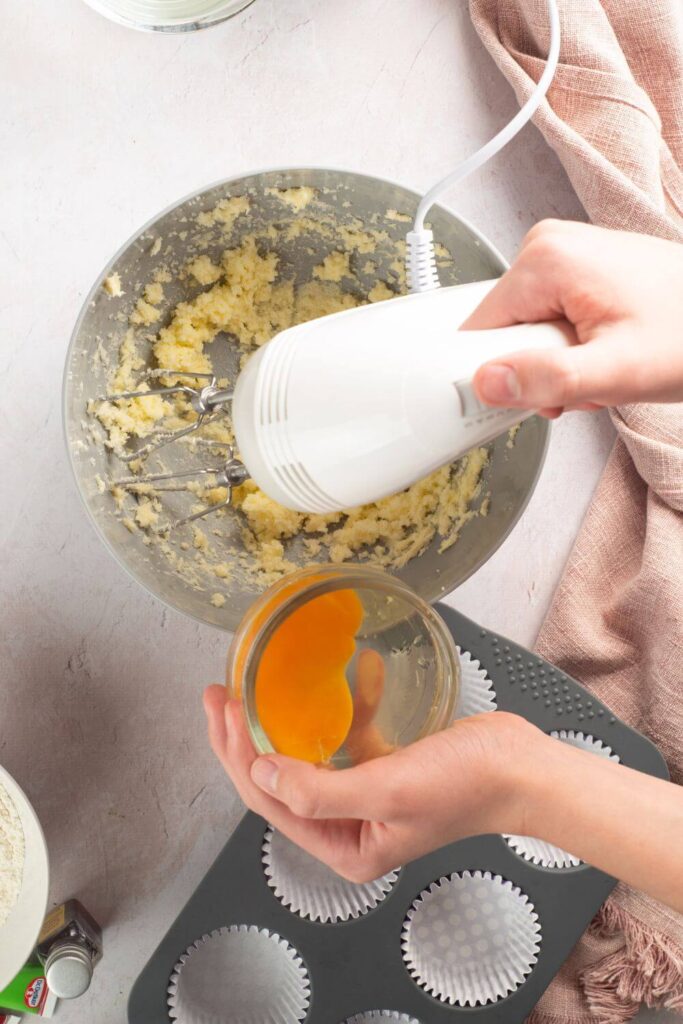
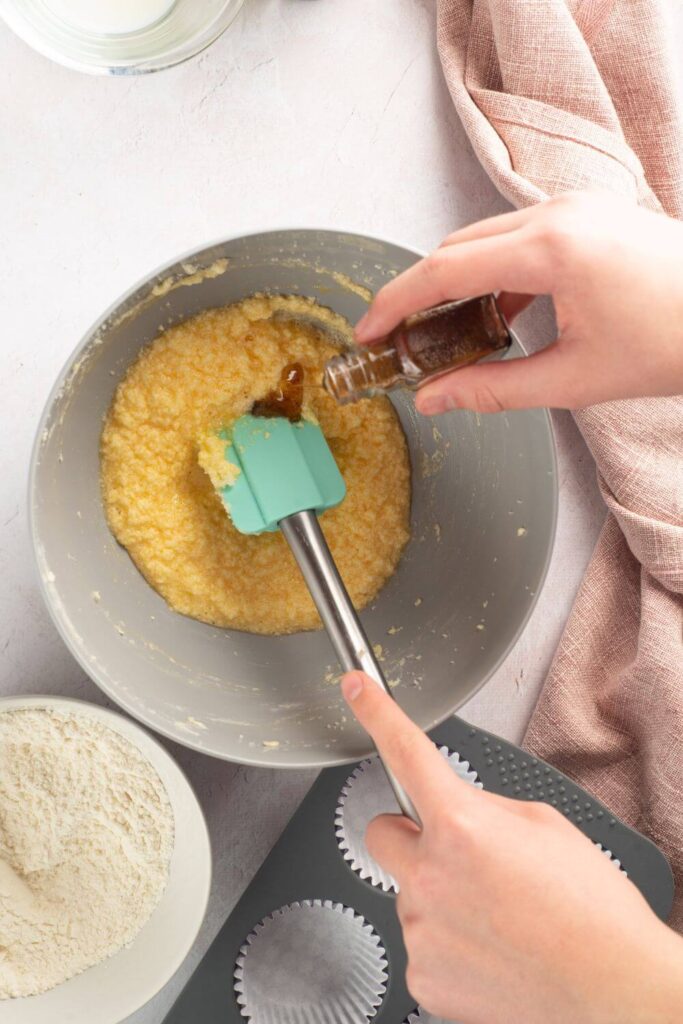
- Add the egg and vanilla. Crack in the egg and pour in the vanilla extract. Mix everything just until it’s combined and smooth. This is where the batter starts coming to life, and oh, does it smell amazing already!
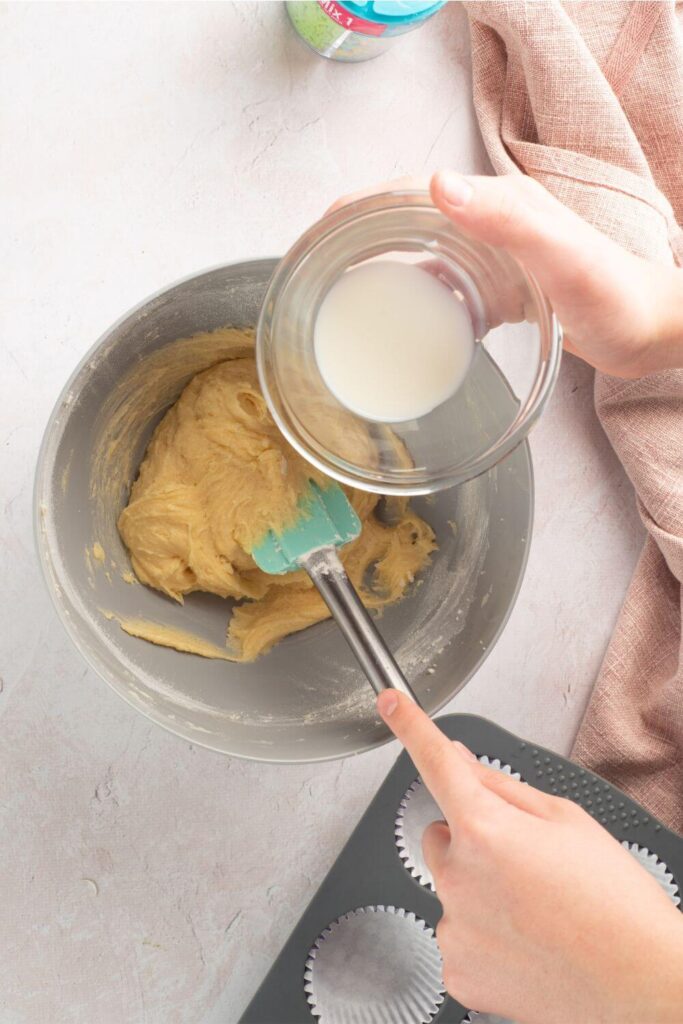
- Combine wet and dry ingredients. Gradually add your dry mix to the creamed butter mixture, alternating with the milk. Fold gently—you’re not trying to stir this batter to death! Overmixing is the fast track to dense, sad cupcakes, and we’re not about that life.
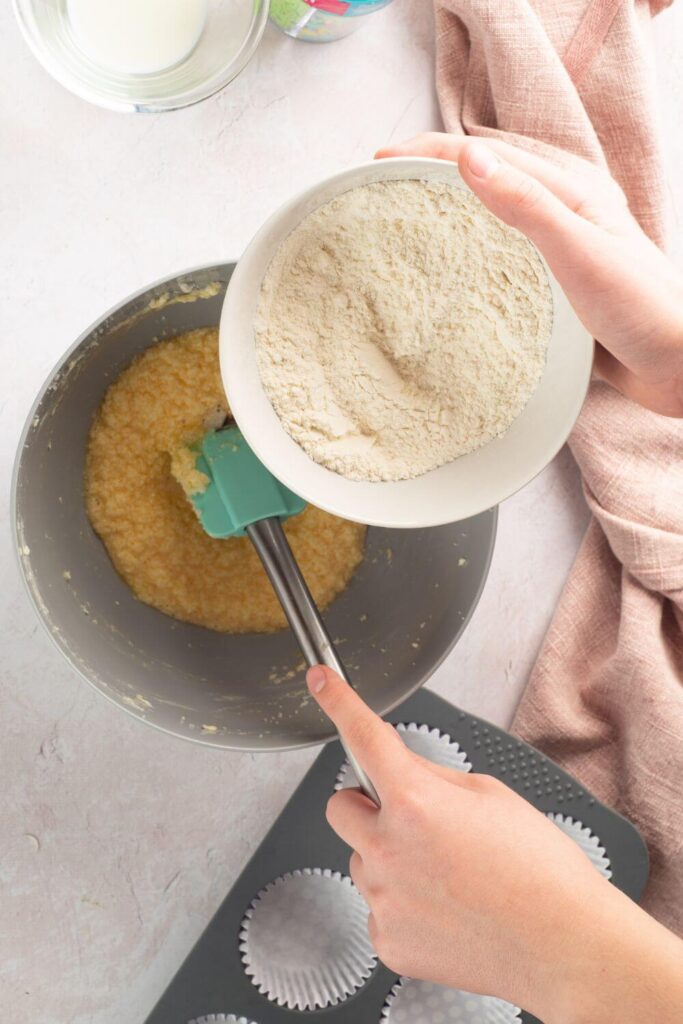
By the end, your batter should be smooth, but don’t worry if it’s not perfectly silky. A few small lumps are fine and totally normal.
Baking Instructions for Perfect Results
This might sound dramatic, but getting baking right really matters! It’s all about precision here, and if you stick to these tips, your cupcakes will come out golden, fluffy, and absolutely dreamy.
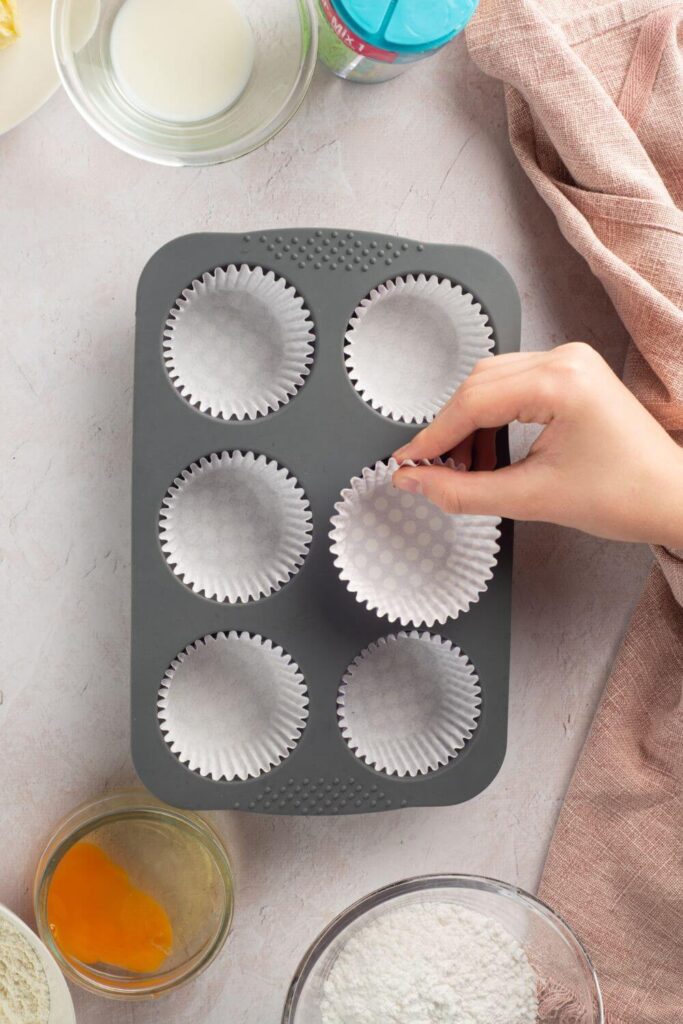
- Preheat and prepare your pan. Crank your oven to 350°F (180°C) and line your muffin tin with cupcake liners. Trust me, the liners are non-negotiable unless you love dealing with stuck cupcakes. (Spoiler: no one does.)
- Fill the liners just right. Grab a spoon or small scoop to fill each liner about halfway. Don’t overdo it! These cupcakes will rise, and you don’t want them spilling over the edges.
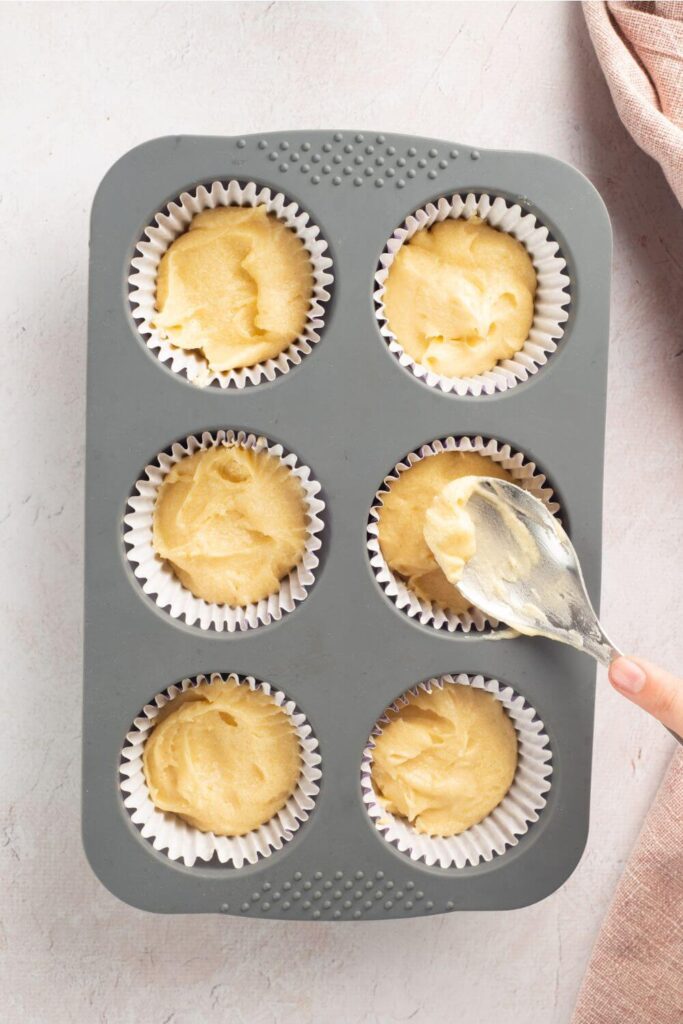
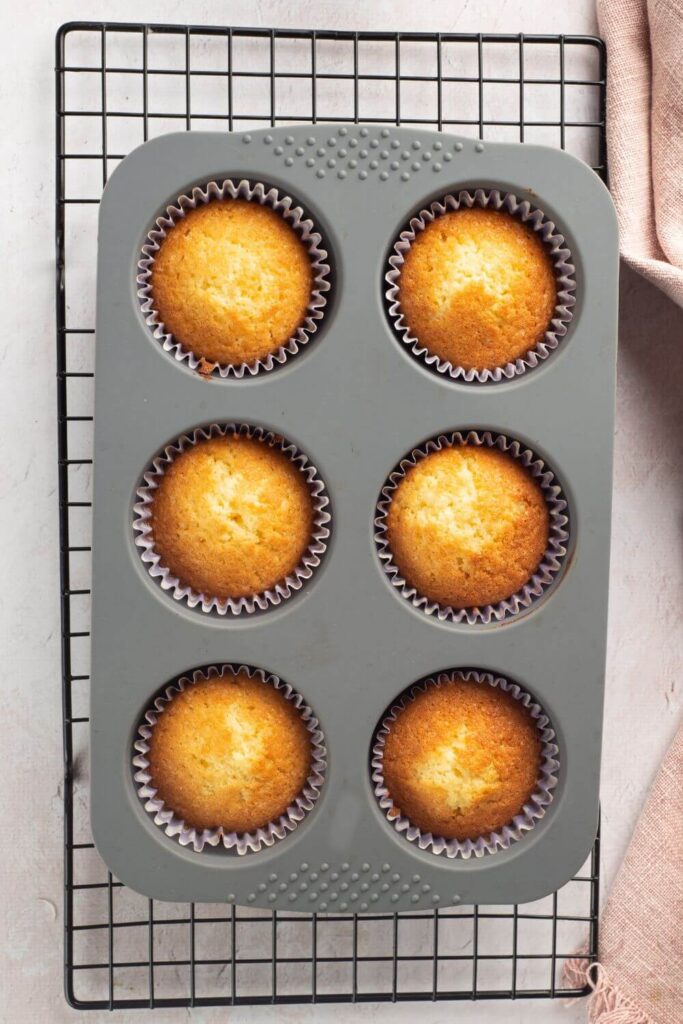
- Bake and test. Pop the tray into the oven and bake for 12–15 minutes. The kitchen will start to smell amazing—like vanilla heaven—and that’s your cue to check them. Stick a toothpick in the center of a cupcake. If it comes out clean or with a few crumbs, you’re good to go.
- Cool down before decorating. This part is SO important. Let the cupcakes cool completely in the pan before frosting. Frosting warm cupcakes is a rookie mistake—they’ll melt, slide, and just look messy. Patience is key here!
Making and Applying the Frosting
Alright, time to move on to the frosting—aka the best part! This step is when you really get to flex your inner artist. Plus, frosting is like the glue that holds all that Easter charm together.
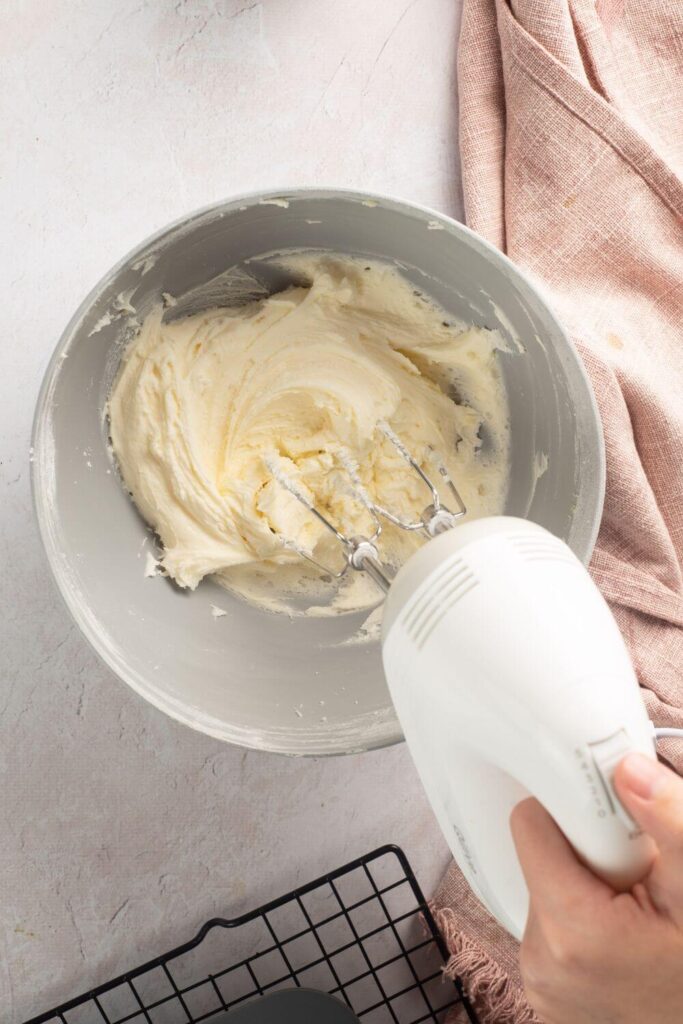
- Whip the butter. Start by beating your softened butter until it’s pale and fluffy. You’ll want to do this step for a solid 3-5 minutes. Fluffy butter = fluffy frosting. See, math can be fun!
- Add powdered sugar slowly. No one wants a sugar snowstorm in their kitchen, so take it slow and steady when adding your powdered sugar. Mix after each addition until smooth.
- Adjust consistency if needed. If your frosting feels too thick, add just a tiny splash of milk. And I mean tiny—like half a teaspoon at a time. Too runny? Add a little more powdered sugar. The goal is a texture that holds its shape when piped but doesn’t feel stiff.
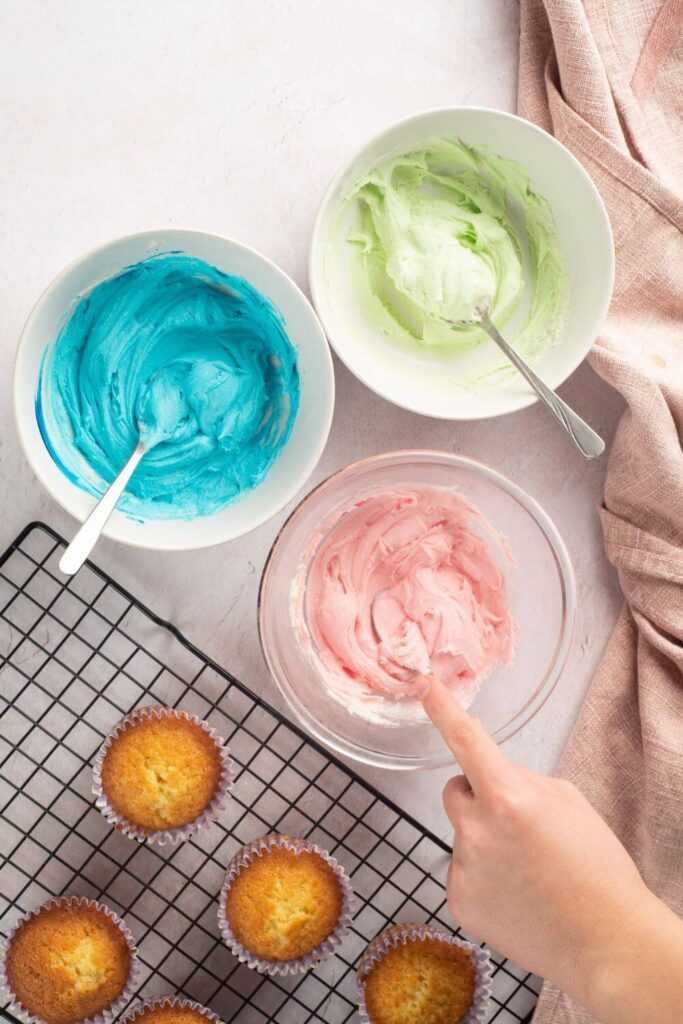
- Divide and color. Separate your frosting into a few bowls and add a small drop of food coloring to each. Easter is all about pastels, so go light here. You can always add more, but you can’t take it back!
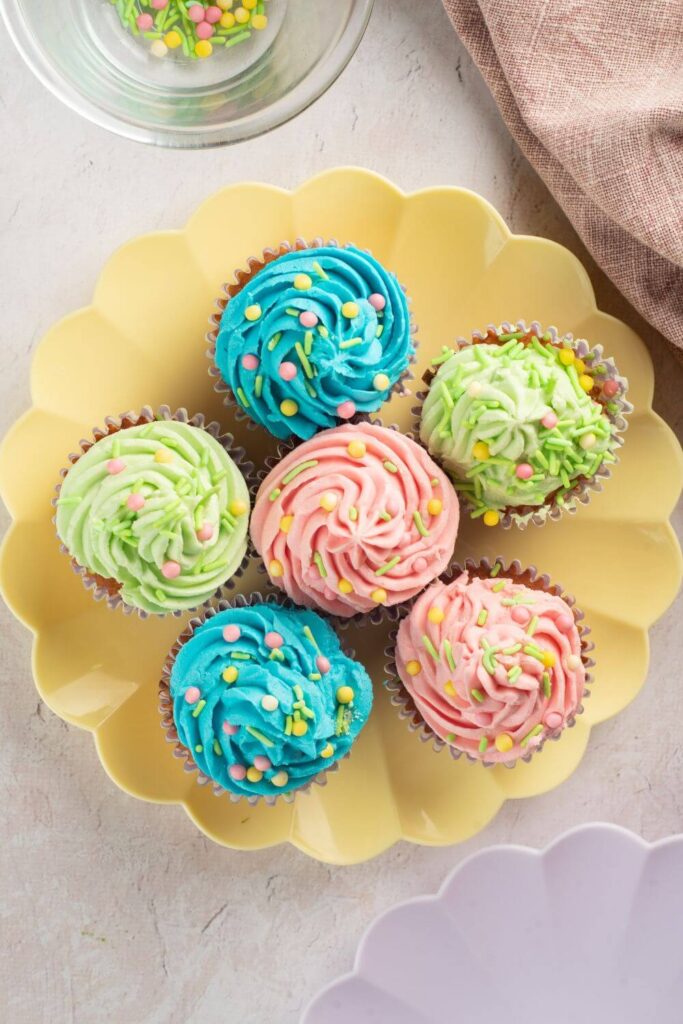
- Pipe like a pro. Transfer each colored frosting into a piping bag fitted with a star nozzle. Swirl it onto your cupcakes in layers for a pretty multicolored effect. Not feeling fancy? A spoon works too—rustic frosting is still delicious!

Creative Easter-Themed Decoration Ideas
Here’s where you can let those creative juices flow. Decorations are the soul of Easter cupcakes, and the possibilities are endless. You don’t have to be a dessert artist—just have fun with it! Here are some of my favorite ideas to get you started:
- Pastel sprinkles. Scatter pastel-colored sprinkles over the frosting for an instant Easter vibe. The combination of colors can make them look like tiny Easter eggs.
- Candy eggs. Top each cupcake with a few mini candy eggs—the foil-wrapped ones or the speckled chocolate kind work great. It’s like creating your own little edible egg hunt!
- Easter toppers. Think edible flowers, sugar bunnies, or even small marzipan carrots. They add a whimsical touch that’s almost too cute to eat. Almost.
- Bunny faces. Use marshmallows for the ears and chocolate chips for eyes to create adorable bunny-themed cupcakes. They’ll be the talk of any Easter party!
- Color gradients. If you’re up for a tiny challenge, try blending two frosting colors together in one piping bag for a beautiful ombre effect on your cupcake swirls.

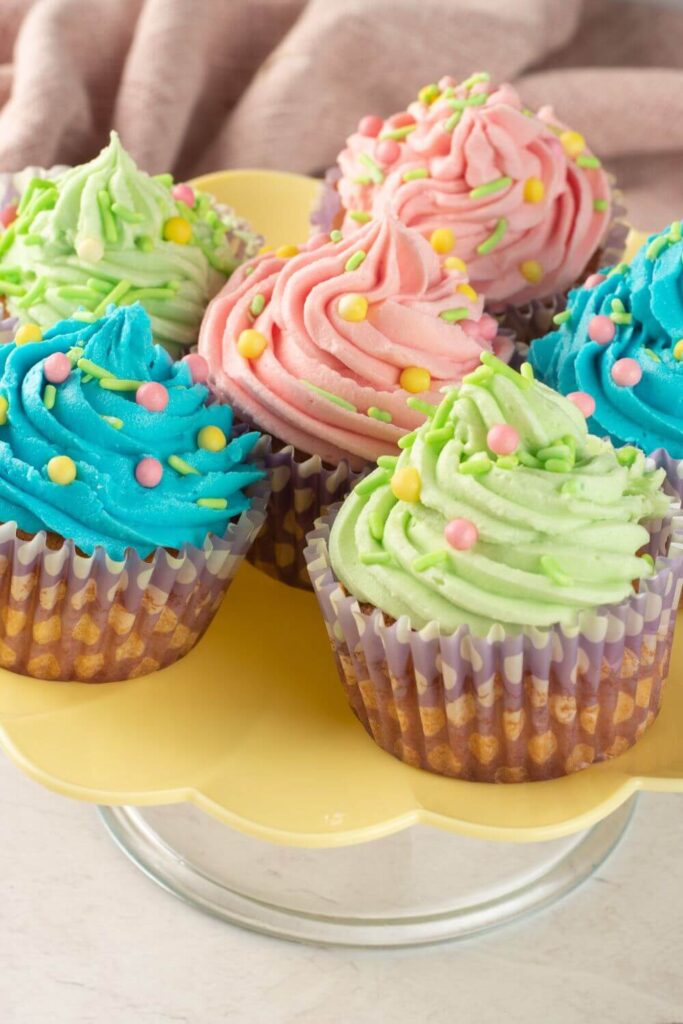
And there you have it—adorable Easter vanilla cupcakes that not only taste amazing but are almost too pretty to eat.
This is the kind of project that makes the holiday feel extra special, whether you’re baking with kids or surprising your friends and family.
Easter Vanilla Cupcakes
Ingredients
For the Cupcakes:
- ¼ cup softened butter
- ¼ cup sugar
- 1 egg
- 1 tsp vanilla extract
- ½ cup all-purpose flour
- 1 tsp baking powder
- 1 tbsp milk
For the Icing:
- ⅓ cup softened butter
- 1 cup powdered sugar
- 1 drop gel food coloring
- ¼ cup sprinkles
- 1 tsp milk optional
Instructions
- Preheat the oven to 180°C and line a muffin tin with cupcake cases.
- In a bowl, cream together softened butter and sugar until light and fluffy. Add an egg and vanilla extract, then gradually incorporate the flour and baking powder. Lastly, mix in the milk.
- Spoon the batter into the prepared muffin tin, filling each cup about halfway. Bake for 12-15 minutes or until a toothpick inserted into the center comes out clean. Allow the cupcakes to cool completely.
- For the icing, beat the softened butter until creamy and fluffy. Slowly add powdered sugar, and if needed, incorporate a splash of milk to achieve the desired consistency. Divide the icing into three bowls and add a drop of food coloring to each bowl. Transfer each colored icing into a piping bag with a star nozzle.
- Once the cupcakes are cooled, pipe the colored icing onto each cupcake in a swirl pattern. Finish by sprinkling with your favorite sprinkles.