Halloween Candy Corn Mini Cheesecakes
Tell me this: is there anything better than the buzz of Halloween? The crisp air, the crunch of fallen leaves, and, if you’re like me, an excuse to eat way too much sugar.
Let’s be real. Some people wait for pumpkin spice, but I’m here for the bag of candy corn.
Love it or hate it, those little stripes of yellow, orange, and white are Halloween in a bite. But you know what’s even better? Transforming that iconic look into creamy, dreamy mini cheesecakes that’ll light up every party table and get the kids running (okay, maybe adults too).
Save for later:
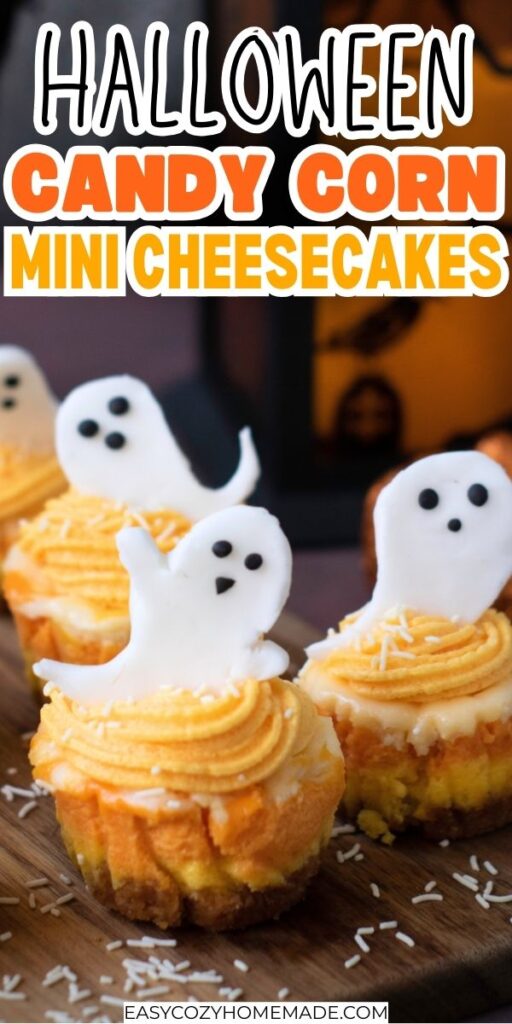
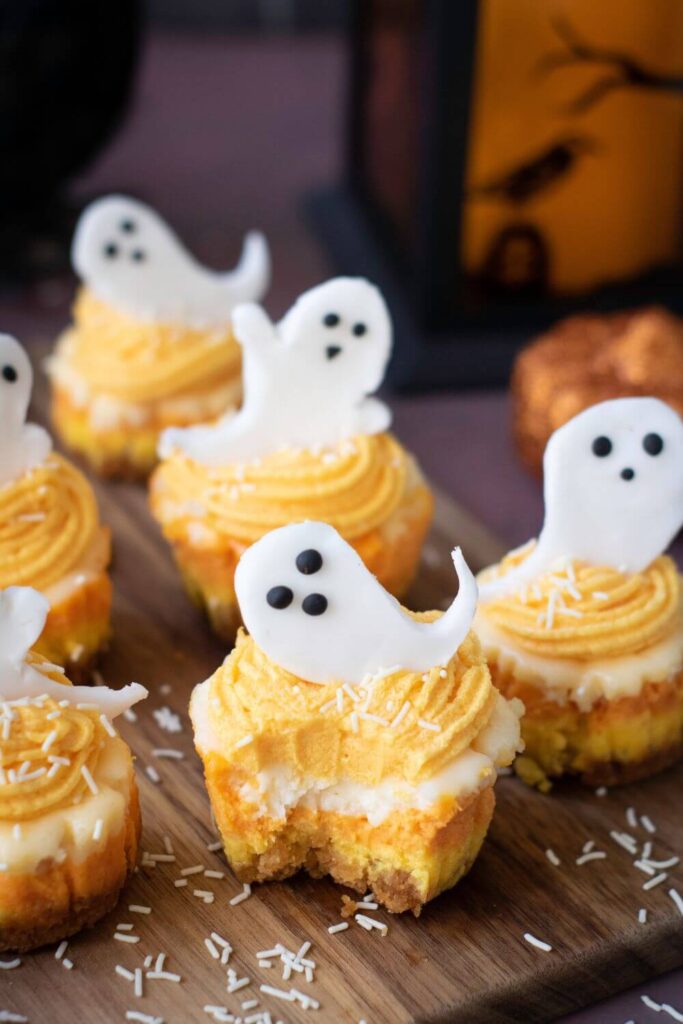
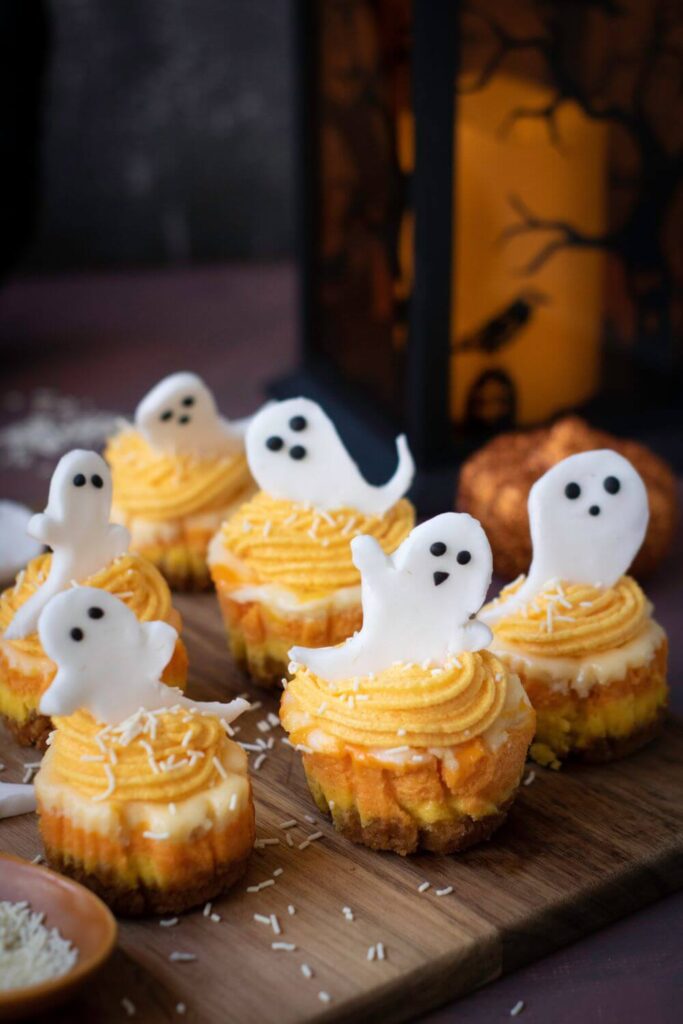
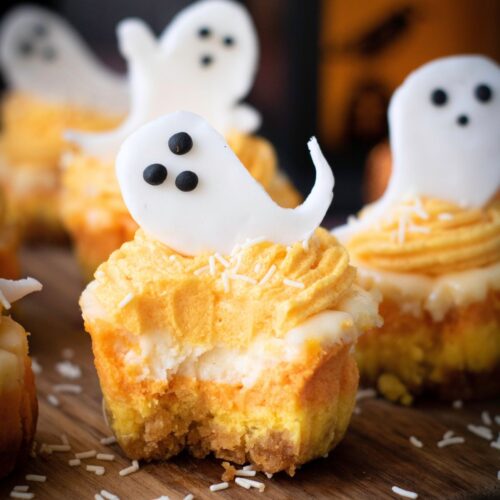
Candy corn mini cheesecakes are cute. They’re fun. They taste like a classic cheesecake, but they look like you spent hours pulling off a Pinterest miracle—except, you didn’t.
These are easy, colorful, and guaranteed to make you look like the host with the most. Plus, you get those classic layers: yellow, orange, and white.
Throw on a sugary ghost on top? Hello, spook-tacular dessert.
Ready? Let’s do this.
Ingredients

If you peek in your pantry, you probably have most of this stuff. Here’s what you’ll need to make twelve dreamy, festive bites:
- Graham cracker crumbs (1 cup): These bring a crunchy, buttery base that holds everything together. You can swap in vanilla wafers or even chocolate cookies if you’re feeling wild.
- Granulated sugar (2 tablespoons for crust, 1/2 cup for filling): Sweetness is simple and perfect. The sugar in the crust caramelizes just a little, and the filling is sweet without being cloying.
- Unsalted butter (1/4 cup, melted for crust + 1/2 cup, softened for frosting): Butter makes everything better. Melted in the crust for a stick-together base. Softened in the frosting for a creamy, rich topper.
- Cream cheese (16 ounces, softened): The soul of any cheesecake. Room temperature is the secret for a smooth, lump-free fill. Don’t go low-fat—it just isn’t the same.
- Eggs (2, medium): These give structure to keep your cheesecakes light but sliceable.
- Vanilla extract (1 teaspoon for filling, 1 teaspoon for frosting): This ties the flavors together. The smell alone makes it feel like a treat worth celebrating.
- Sour cream (1/2 cup): Adds a bit of tang, keeps the filling creamy. Greek yogurt can work in a pinch, but sour cream gives you that signature taste.
- Food coloring (orange and yellow): For those iconic candy corn layers. Gel coloring gives the brightest pop, but liquid works too. A little goes a long way.
- Powdered sugar (2 cups, for frosting): For a fluffy, melt-in-your-mouth frosting.
- Heavy cream (2-3 tablespoons, for frosting): This helps whip the butter and sugar into a light, spreadable cloud. Milk works if you’re out of cream.
- White sprinkles: Because sprinkles make everything more cheerful.
- White sugar paste or fondant: For ghosts! Store-bought works great. You could also use melted white chocolate and pipe little ghost shapes if you’re feeling crafty.
- Black fondant, food coloring, or edible marker: For the ghost faces. I always fall back on a food-safe marker; it’s just easy and mess-free.
If you’re in a jam for one of these, wing it! I’ve swapped out the crust for crushed pretzels and topped with candied orange peel once—still delicious.
How to Make It
This is where the magic happens. It looks fancy, but honestly, if you can mix, layer, and bake, you’ve got this. Get the kids to help. Or don’t. I won’t judge.
Crust Preparation
Start strong. Preheat your oven to 325°F (165°C). Line a standard 12-cup muffin tin with cupcake liners—you’ll thank yourself at clean-up time.
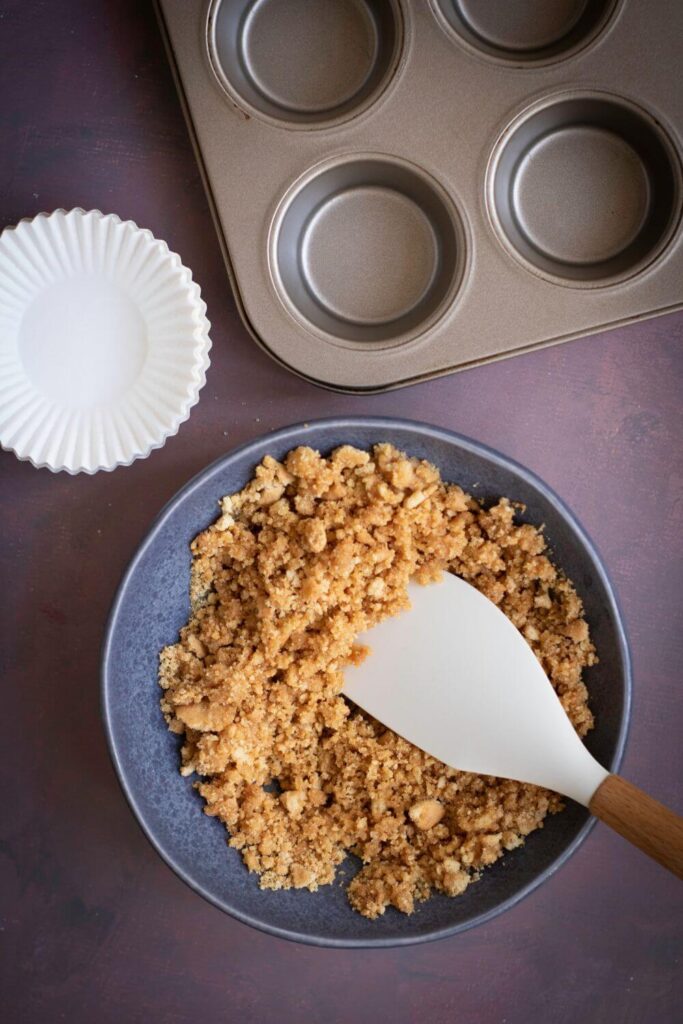
Grab a bowl and toss in the graham cracker crumbs, 2 tablespoons sugar, and the melted butter. Mix until every crumb glistens and sticks together when pressed.
Divide this sandy goodness across the liners (about a tablespoon each). Press down hard—a small glass works wonders here.
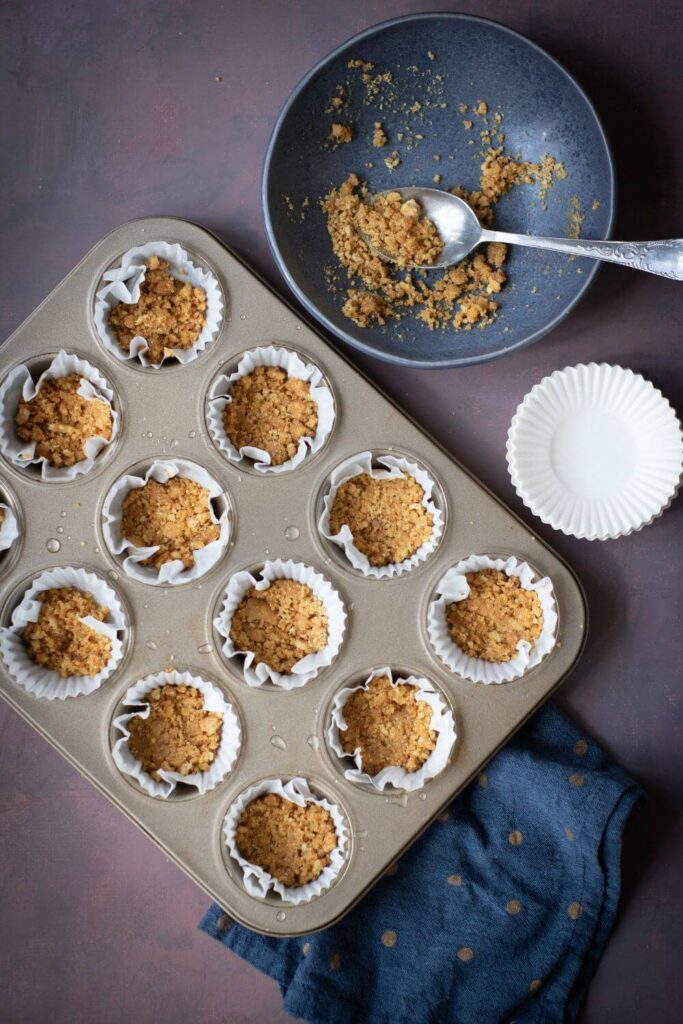
Bake for 5 minutes. Don’t skip this—pre-baking keeps everything crisp, not soggy. Set aside to cool for a few minutes. Your kitchen will start smelling like toasted graham heaven.
Making and Coloring the Cheesecake Batter
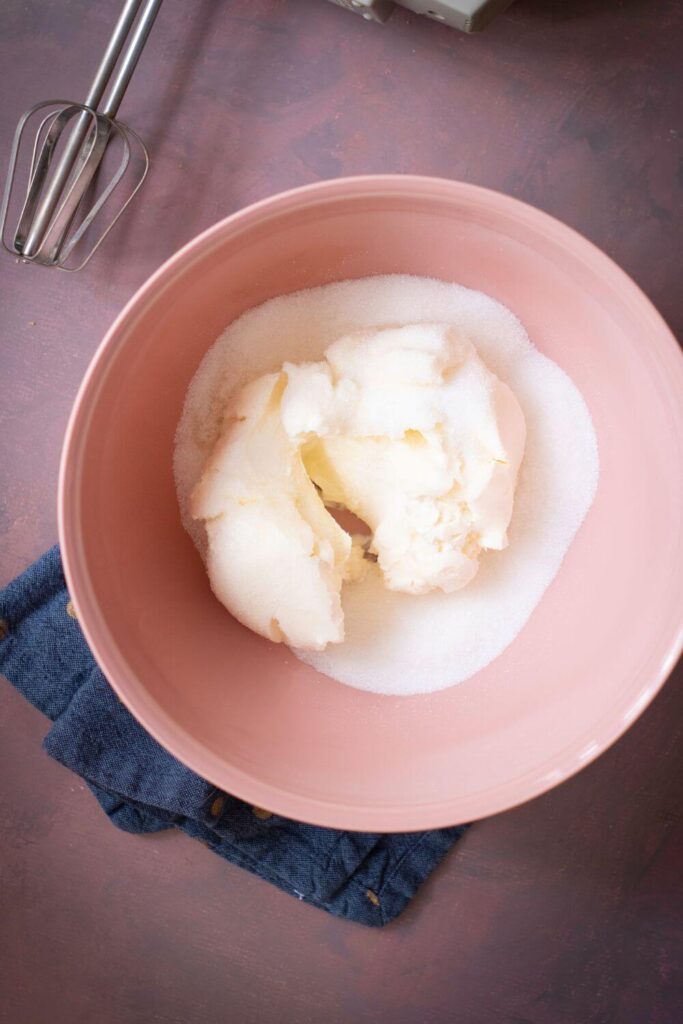
Now for the filling. In a big bowl, toss in the cream cheese. Beat until smooth and fluffy. Add the sugar and keep beating.
Next, eggs—one at a time, beating after each (no one likes scrambled egg bits in cheesecake). Stir in vanilla and sour cream last, scraping the bowl so it all comes together.
Now, the fun part. Take your creamy concoction and split it evenly into three bowls.
- Tint one with yellow food coloring.
- Color another orange.
- Leave the last one plain.
Start slow with the color—one drop at a time. You want it bright but not neon.

Layering the Candy Corn Colors
Here’s where you become an artist. Spoon a layer of yellow cheesecake batter into each liner first (about a heaping teaspoon each). Smooth it gently so it covers the crust.
Next, orange. Careful not to mix the colors too much—gentle spreading with the back of a little spoon helps. Finally, top with the plain white layer.


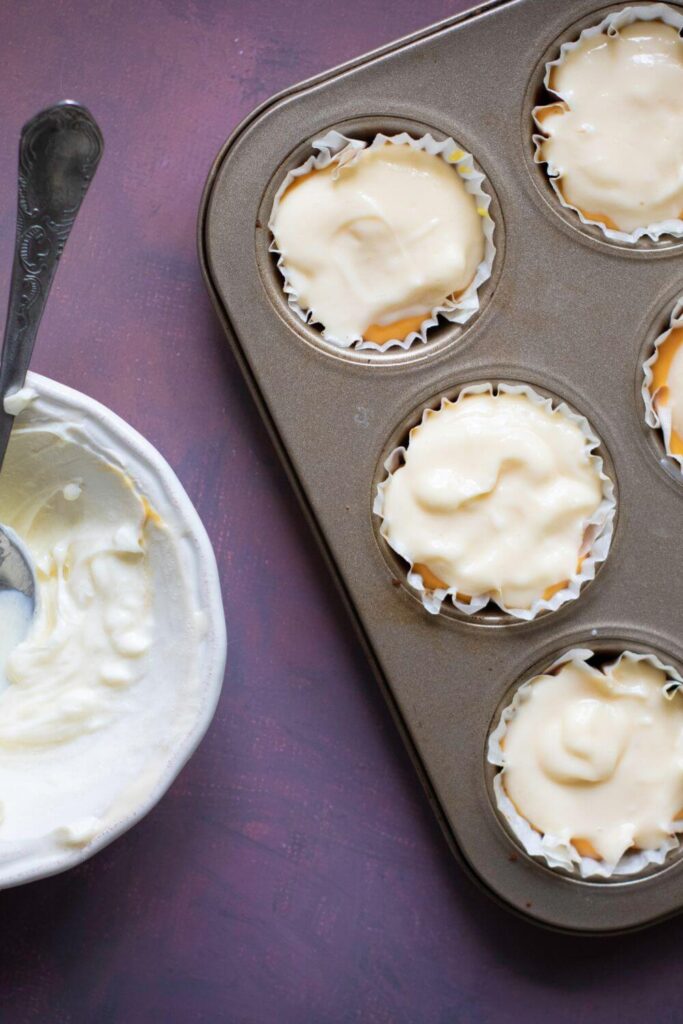
You’ll see those candy corn layers coming to life right in your muffin tin. Resist the urge to eat the raw batter. Or don’t. I won’t lie—it’s tempting.
Baking, Cooling, and Chilling
Pop your tin in the oven. Bake for 18-20 minutes. You want them set at the edges and just a bit wobbly in the center. Cheesecake is done before it looks done. That’s the trick.
Let them cool in the pan for at least 30 minutes. Warm cheesecake is not cute. Once they’re at room temp, move to the fridge to chill at least 4 hours. Overnight is even better—they firm up and slice cleaner.
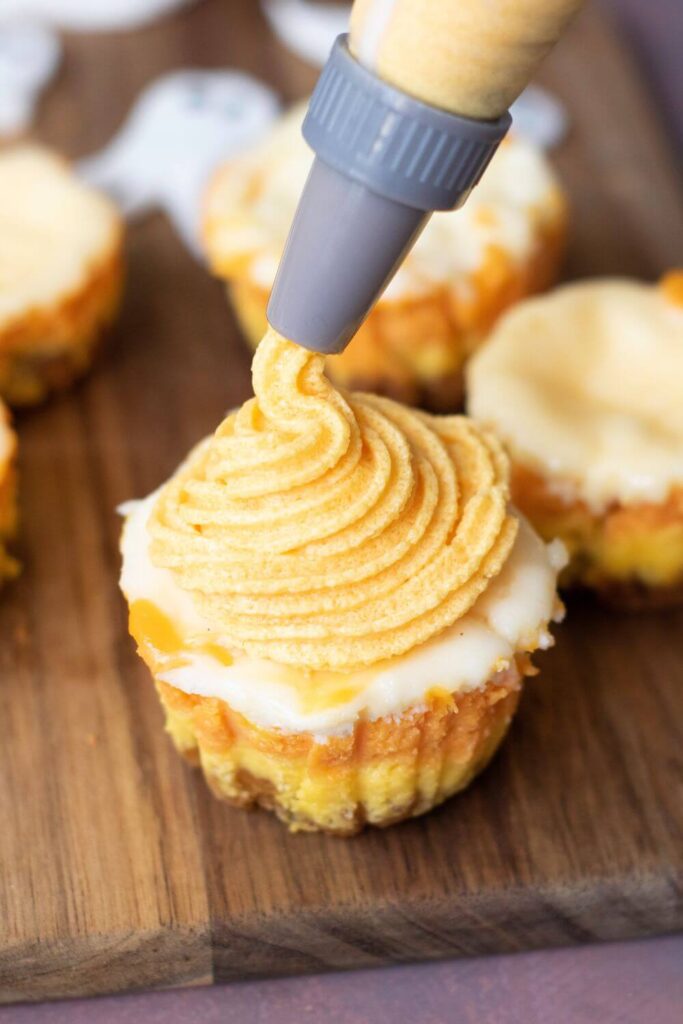
Orange Frosting and Decorating
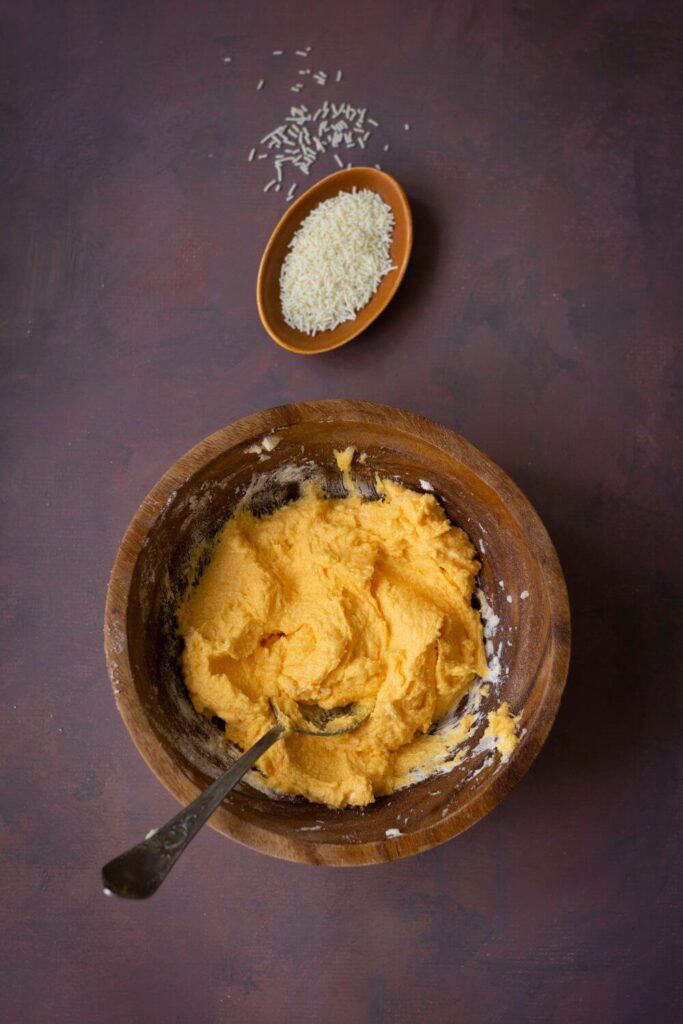
When your cheesecakes are cold, make the frosting. Beat the butter until smooth. Gradually add powdered sugar—slowly, or your kitchen will look like a snowstorm.
Pour in the cream and vanilla. Keep beating until it’s fluffy. Toss in orange food coloring for a shock of bright Halloween energy.
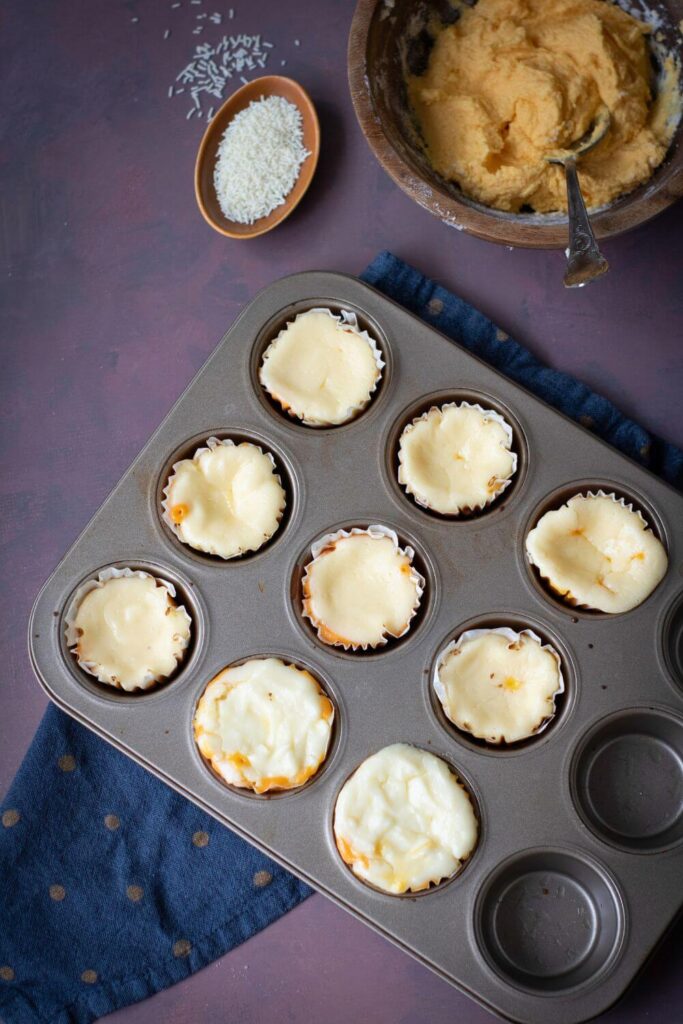
Slather or pipe a swirl of frosting on each chilled cheesecake. Dust with white sprinkles for fun.
If you want to skip the frosting, that’s fine—the cheesecakes are great on their own. But frosting? It’s Halloween. Go big.
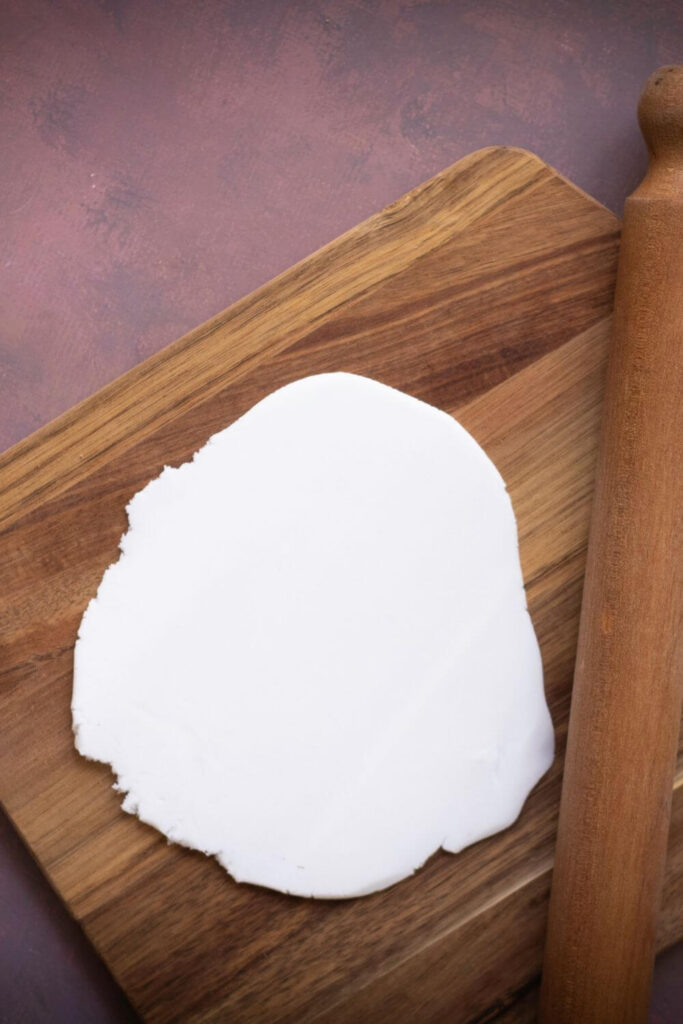
Sugar Paste Ghosts
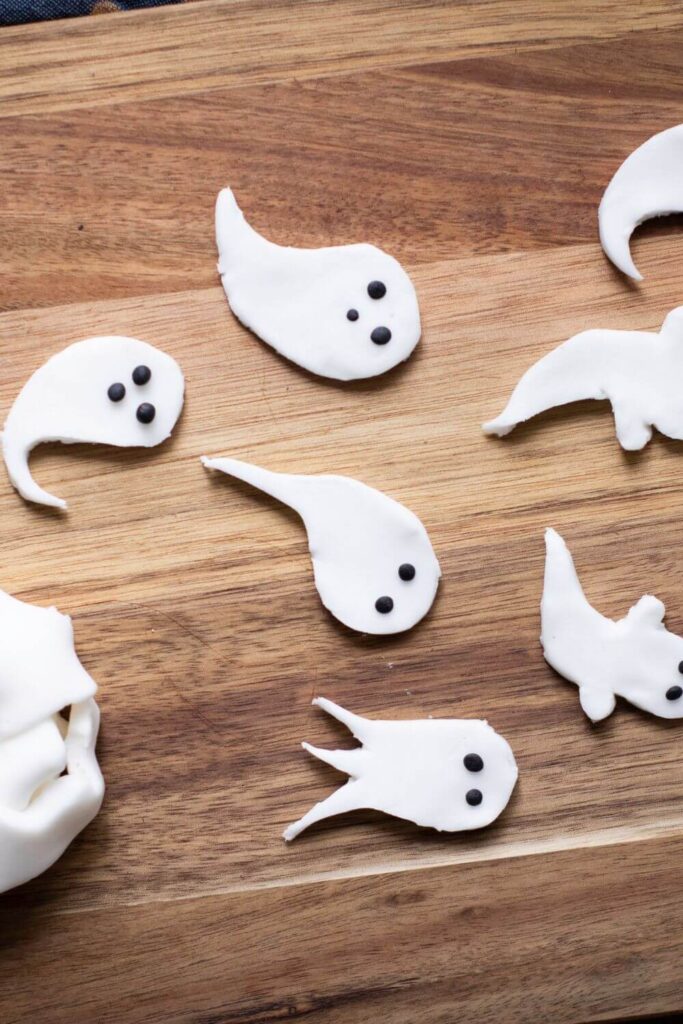
Roll out your fondant or sugar paste. Cut tiny ghosts—I use a small cookie cutter, but freestyle is fine (they can look a little silly; it adds to the charm).
Draw faces with your edible marker or dot on melted chocolate for eyes and mouths.
Pop a ghost on each mini cheesecake and call it done. That’s the finishing touch.
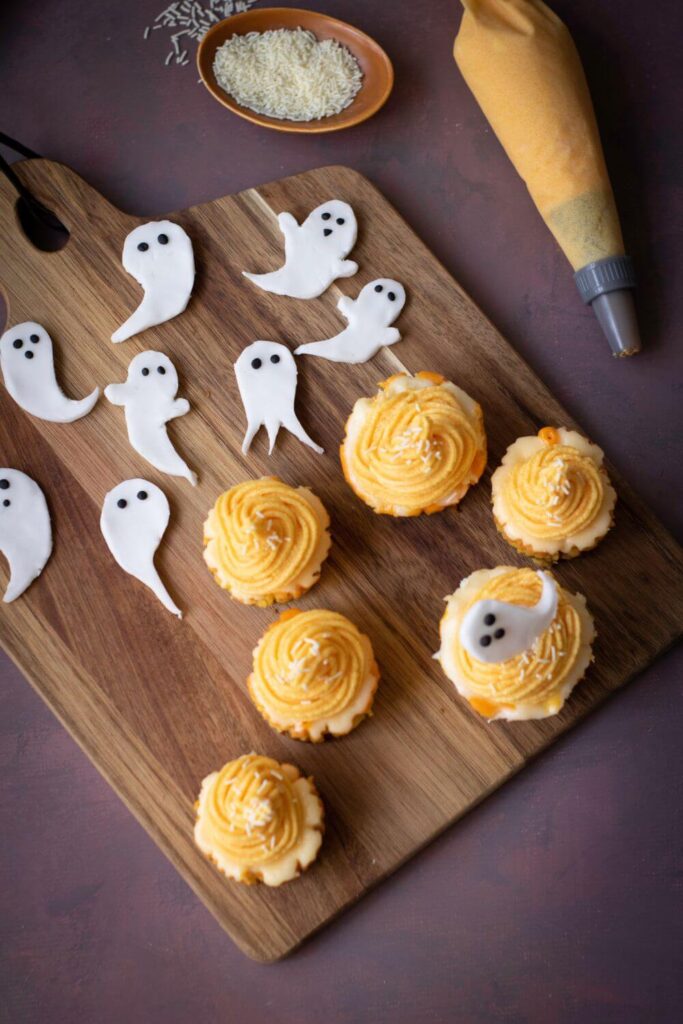
Keep them in the fridge until you’re ready to eat. They’ll stay fresh for up to three days—if they last that long.
Halloween Candy Corn Mini Cheesecakes
Ingredients
For the Crust
- 1 cup graham cracker crumbs
- 2 tablespoons granulated sugar
- 1/4 cup unsalted butter melted
For the Cheesecake Filling
- 16 ounces cream cheese softened
- 1/2 cup granulated sugar
- 2 medium eggs
- 1 teaspoon vanilla extract
- 1/2 cup sour cream
- Orange and yellow food coloring
For the Orange Frosting
- 1/2 cup unsalted butter softened
- 2 cups powdered sugar
- 2-3 tablespoons heavy cream
- 1 teaspoon vanilla extract
- Orange food coloring
For the Decorations
- White sprinkles
- White sugar paste or fondant
- Black fondant or food coloring or edible marker
Instructions
For the Crust
- Preheat the oven to 325°F (165°C). Line a 12-cup muffin tin with cupcake liners.
- In a medium bowl, combine the graham cracker crumbs, granulated sugar, and melted butter. Mix until the crumbs are evenly coated.
- Divide the crumb mixture evenly among the 12 cupcake liners, pressing down firmly to create an even crust layer. Bake for 5 minutes, then set aside to cool slightly.
For the Cheesecake Filling
- In a large bowl, beat the softened cream cheese with an electric mixer until smooth. Add the granulated sugar and continue to beat until well combined.
- Add the eggs one at a time, beating well after each addition. Mix in the vanilla extract and sour cream until smooth and creamy.
- Divide the cheesecake batter evenly into three bowls. Tint one bowl with yellow food coloring, one with orange food coloring, and leave the remaining bowl plain.
- Spoon a layer of yellow cheesecake batter into each cupcake liner, followed by a layer of orange, and finally a layer of plain batter.
- Bake for 18-20 minutes, or until the centers are set. Allow the cheesecakes to cool in the pan for 30 minutes, then transfer to the refrigerator to chill for at least 4 hours or overnight.
For the Orange Frosting
- In a large bowl, beat the softened butter with an electric mixer until light and fluffy.
- Gradually add the powdered sugar, beating until smooth and well combined.
- Add the heavy cream and vanilla extract, and beat until the frosting is light and fluffy. Tint with orange food coloring.
- Once the mini cheesecakes are fully chilled, remove them from the liners and frost the tops with the orange frosting.
- Sprinkle the white sprinkles over the frosted cheesecakes.
For the Sugar Paste Ghosts
- Roll out the white sugar paste or fondant and cut into small ghost shapes using a cookie cutter or freehand with a knife. Use black food coloring or an edible marker to add eyes and mouths to the ghosts.
- Place a sugar paste ghost on top of each frosted cheesecake.
- Serve immediately or store in an airtight container in the refrigerator for up to 3 days.