Christmas Lights Cookies
These Christmas Lights Cookies look like tiny strings of holiday lights, and the decorating is simpler than it looks. Each buttery cookie gets a smooth white icing base, a wavy black line, and colorful candy “bulbs.” No fancy cookie art skills needed. A slightly crooked string of lights still looks cute!

The dough uses a short list of ingredients, and chilling it makes the cookies easier to roll and cut. Once they are baked and cooled, you can settle in for the fun part. These would be lovely on a Christmas cookie tray or packed into a little holiday gift box. Just let the icing set before moving them around.

Yield: 10–12 cookies
Prep Time: 20–25 minutes
Cook Time: 8–10 minutes
Total Time: 1 hour 35 minutes, including chilling time
Ingredients

Softened butter is important here. It should give a little when you press it, but it should not be melted or greasy. That makes it easier to beat with the sugar until light and fluffy. You will only need the egg yolk for the dough, so separate the egg before you start mixing.
For the white icing, use a pasteurized egg white, as listed below, since the icing is not cooked. Add the water gradually rather than pouring it all in at once. The icing should spread easily but stay thick enough to leave a neat white layer on the cookies.
Mini M&M’s or other small candy-coated chocolates make the colorful lights. Have them ready before piping the black icing so you can add the candies while the line is still soft enough to hold them.
For the Cookies
- ½ cup / 1 stick (115 g) unsalted butter, softened
- ⅓ cup (75 g) granulated sugar
- 1 egg yolk
- ½ tsp (2.5 g) baking powder
- 1 ¼ cups (150 g) all-purpose flour
- 1 pinch fine salt
For the Icing and Decoration
- 1 cup (125 g) powdered sugar
- 1 pasteurized egg white
- ½–1 tbsp (7.5–15 ml) water, as needed
- Black decorating icing
- Mini M&M’s or colorful candy-coated chocolates
How to Make Christmas Lights Cookies
Step 1: Beat the Butter and Sugar
Beat the softened butter and granulated sugar together until light and fluffy. Scrape down the sides of the bowl as needed so you do not leave little patches of unmixed butter behind.
Add the egg yolk and mix until fully combined. The mixture should look smooth before you move on to the dry ingredients.
Step 2: Mix the Dough
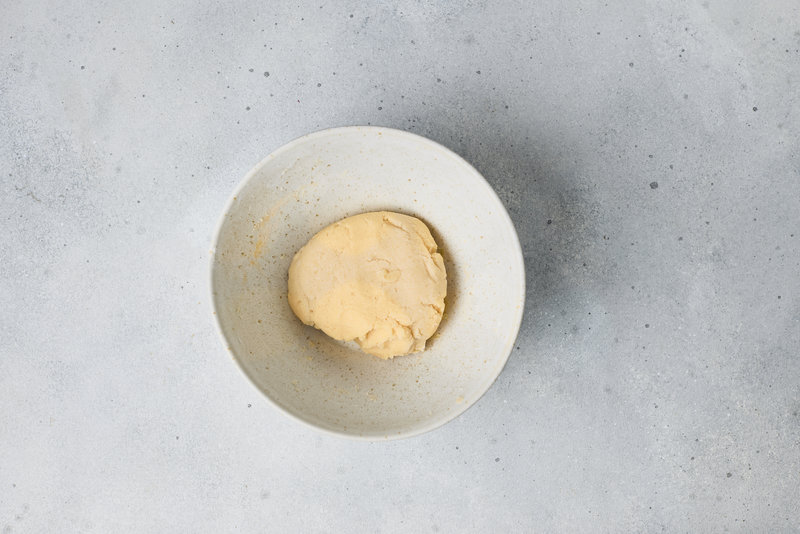
Add the all-purpose flour, baking powder, and fine salt. Mix gently, just until a soft dough forms.
Once the flour is mixed in, stop. There is no need to keep beating the dough, and gentle mixing helps keep the cookies tender.
Step 3: Chill for One Hour
Wrap the dough tightly in plastic wrap and refrigerate it for 1 hour.
Do not skip this part, even if you are eager to get decorating. Chilling firms up the dough so it is less sticky and easier to cut into clean circles.
Step 4: Roll and Cut the Cookies
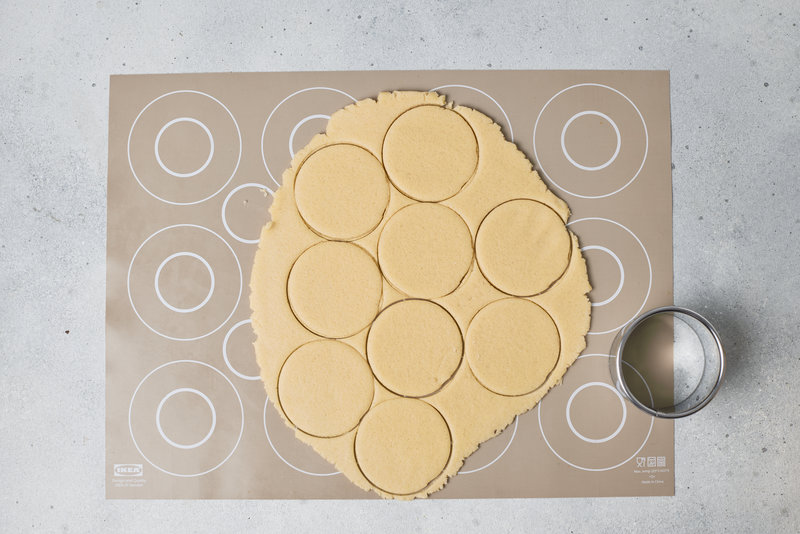
Preheat your oven to 350°F (180°C).
Roll the chilled dough to about ⅕-inch (5 mm) thickness, then cut out round circles with a cookie cutter. Try to keep the thickness even across the dough so the cookies bake at the same rate.
If the dough feels too firm straight from the refrigerator, let it sit briefly until you can roll it without cracking. You still want it cool, not soft and sticky.
Step 5: Bake and Cool Completely
Bake the cookies for 8–10 minutes, until the edges are lightly golden. Start checking at 8 minutes, since thin cookies can go from pale to browned fairly quickly.
Allow them to cool completely before decorating. Even a little leftover warmth can make the icing run, so this is a good time to get your decorating supplies ready.
Step 6: Prepare the White Icing
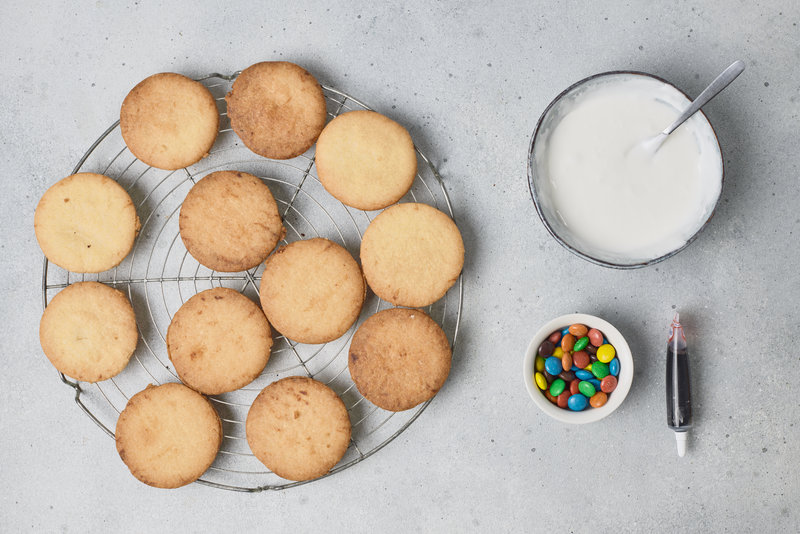
Whisk the powdered sugar and pasteurized egg white together in a bowl. Gradually add a small splash of water until the icing reaches a thick, spreadable consistency, using ½–1 tablespoon as needed.
It should be easy to smooth over a cookie without dripping straight off the edges. Go slowly with the water. A little makes a noticeable difference!
Step 7: Add the White Base
Spread a thin, even layer of white icing over each cooled cookie. Let it set completely before adding the black decorating icing.
This wait helps keep the colors separate. If the white icing is still wet, the black line can bleed into it instead of staying crisp.
Step 8: Make the Christmas Lights

Pipe a wavy line across each cookie with the black decorating icing. Think loose loops and gentle curves, not a perfectly straight line.

Press the mini M&M’s or colorful candy-coated chocolates along the black line, standing them up slightly to resemble little holiday bulbs. Use a gentle touch so you do not push through the white base.
Let the decorations set before serving or storing.

Keep Your Cookie Lights Looking Bright
How Do I Keep the Black Icing From Bleeding?
Make sure the white base is completely dry and set before piping the black line. It may look ready on the surface before it has fully firmed up, so give it enough time.
If you are decorating several cookies, finish all the white bases first. Then come back to the black lines once they are set.
What If My White Icing Is Too Thick?
Add the water a little at a time, within the amount listed in the recipe, and whisk well after each addition. You want a thick, spreadable icing, not a thin glaze.
Aim for a consistency you can gently smooth over the cookie with the back of a spoon.
How Do I Get the Candy Lights to Stay in Place?
Add the candies while the freshly piped black icing is still soft. Decorate one cookie at a time so the line does not dry before you attach the bulbs.
Stand each candy up slightly and press gently into the black icing. Then leave the cookie undisturbed while it sets.
Can I Bake the Cookies Ahead of Time?
Yes! The undecorated baked cookies can be frozen for up to 2 months. Let them thaw completely at room temperature before icing them.
This is a handy way to split up the work. Bake ahead, then save the decorating for a quieter afternoon.
How Should I Store the Decorated Cookies?
Store them in a single layer in an airtight container at room temperature for up to 1 week.
Make sure the icing and decorations have set before putting them away. Keeping them in one layer helps protect those little candy lights from getting knocked off or pressed into another cookie.

Christmas Lights Cookies
Ingredients
For The Cookies
- ½ cup unsalted butter, softened
- ⅓ cup granulated sugar
- 1 egg yolk
- ½ tsp baking powder
- 1 ¼ cups all-purpose flour
- 1 pinch fine salt
Icing & Decoration
- 1 cup powdered sugar
- 1 pasteurized egg white
- 1 tbsp water, as needed
- Black decorating icing
- Mini M&M’s or colorful candy-coated chocolates
Instructions
- Beat the softened butter and granulated sugar together until light and fluffy. Add the egg yolk and mix until fully combined.
- Add the all-purpose flour, baking powder, and salt. Mix gently just until a soft dough forms.
- Wrap the dough tightly in plastic wrap and chill in the refrigerator for 1 hour.
- Roll the chilled dough out to about ⅕-inch (5 mm) thickness. Cut into round circles using a cookie cutter.
- Bake at 350°F (180°C) for 8–10 minutes, until the edges are lightly golden. Allow the cookies to cool completely before decorating.
- Whisk the powdered sugar with the egg white in a bowl. Gradually add a small splash of water until you reach a thick, spreadable consistency.
- Spread a thin, even layer of white icing over each cooled cookie and let it set completely.
- Pipe a wavy line across each cookie using black decorating icing to represent the Christmas light string. Press mini M&M’s along the black line, standing up slightly, to resemble colorful holiday bulbs. Let set before serving.
Notes
Storage: Store decorated cookies in a single layer in an airtight container at room temperature for up to 1 week.
Freezer Prep: Undecorated baked cookies can be frozen for up to 2 months. Thaw completely at room temperature before icing.